Wednesday, February 29, 2012

DIY Post-It Note Goal List

I enjoy crafty projects. I am not always very good at them. But I like them.

About a week ago, I tried my hand at a Do-It-Yourself Post-It Note Goal List. It's a really simple idea,  easy to do and easy to personalize. After I made it, I decided to test it out for a week  before I actually blogged about it. It looks nice, and it keeps things neat and organized, so that your list looks like this :

My finished project.

and not like this:


For starters, you'll need an 11x14 inch sheet of thick drawing paper or cardstock, a pencil, some markers, a ruler, a few Sharpies, and of course, a nice block of Post-Its.
Supplies.

You'll probably find yourself needing other items as you start working on this, but you can decide that for yourself. These are the basic supplies you'll want to have handy.

Sketch out the design you want to use with just a pencil first. I'll demonstrate how I set mine up, but you might want to do yours entirely differently. I started with a 1/2 inch border, then made one large box at the top for my header (4.5 x 10 inches). Inside the header, about a half of an inch from the edge of the header, I made one, 3-inch box.


My outline.

On the rest of the page, I made six more three inch boxes. These will be where the Post-It notes go, so if you want to use slightly larger or smaller post-its, make sure to adjust your sizes accordingly. I have a thing with everything on a page being evenly spaced, so I spent more time than necessary making sure the boxes were just perfectly spaced. I finally ended up leaving about a quarter of an inch between each box, and about 1 inch between the rows.

 After you're satisfied with how your sketch looks, trace over the lines with Sharpie, or some other sort of marker to make sure it stands out.


The next part was my favorite. I got out my colored pencils and markers and decorated the header and in between the boxes. You can doodle and decorate however you like, just make it so that YOU enjoy looking at it. If you like the way it came out, you'll  be more inclined to use it.


My finished page.

 Next, we can finally break out the Post-Its. First, you must decide on a time frame for your goals, or to-dos, or whatever you have decided is the subject of your list. I decided on weekly goals, but daily or monthly could work just as well.

In the box at the top of the page, get a Post-It and write in your timeframe. Mine is in the picture below.  


Don't forget, whichever time frame you choose doesn't need to be permenant. If you decide later you'd rather a shorter or longer timeframe, just replace the Post-It Note with a new one.


 Now make six goals, writing each one on its own Post-It. Stick those Post-In Notes in the little boxes you drew. Hang it up somewhere you'll see it often, and when you've completed one of the tasks/goals, take off the Post-It and dump it.

Like I said, I used it throughout this past week, and today I am finishing the final goal, which was writing two blog posts during the week. The list was easy for me to use, since it was just hanging there in front of me every day, rather than being in a notebook which can be closed and stuffed away in a drawer. Not to mention the satisfaction of pulling off a Post-It note with the completion of each task.


**Credit for this idea goes to this blog.

Sunday, February 26, 2012

M&M Cookie Bars

I found this recipe about a week ago, from this blog. I have made them twice already, and the second batch is already almost gone. :) We devour them quite quickly around here.

Ingredients:

  • 1 stick butter
  • 3/4 cup granulated sugar
  • 1 egg
  • 3/4 tsp. vanilla extract
  • 1.5 cups flour
  • 1/2 tsp. baking powder
  • M&M's (I use about 1/2 cup per batch)
Directions:

  1. Preheat the oven to 350*.
  2. 
    Cooling in the pan.
    
  3. Melt the butter in a large mixing bowl. Stir in the sugar.
  4. Let it cool off slightly, and then beat in the egg and vanilla.
  5. In a smaller bowl, combine the flour and baking powder. Stir this into the wet mixture.
  6. Pour into a greased 8x5 baking dish (or similar size). I used an 8x8 baking dish and spread the dough a little thinner - but I got more cookies out of it. :)
  7. Bake for 13-15 minutes. Watch them carefully though - if you bake them too much before you put the M&Ms in, they won't stick as well.  
  8. Pull them out of the oven and top with M&Ms, gently pressing them into the dough.
  9. Return the cookies to the oven and bake for 10-12 minutes, or until the top is set. The cookies shouldn't wiggle if you shake the pan back and forth. They should be a very light golden brown on the edge, and white in the center.
  10. Cool completely in the pan (about 5 minutes) and then slice. I sliced my cookies fairly small, so I got 25 cookie bars.

 These cookies are actually pretty fast and very simple to make. At first, it took me some time to figure out how long to cook them for and get the perfect amount of softness and chewiness. They are worth the effort, though, and would be great for a party.


Saturday, February 18, 2012

Cake Batter Pudding Cookies

I found this recipe a few weeks ago through a site called Pinterest. I was a little hesitant to make these cookies at first because I wasn't sure how cake batter, pudding mix, and cookies would all taste mixed together. I am so glad I tried it because the cookies were soft and delicious. :)

Cake Batter Pudding Cookies

  • 1 1/2 sticks butter
  • 3/4 cup brown sugar
  • 1/4 cup sugar
  • 1 (3.4 oz) package instant vanilla pudding mix (lemon flavored pudding mix tastes good too!)
  • 3/4 cup yellow cake mix
  • 2 eggs
  • 1 tsp. vanilla
  • 1 tsp. baking soda
  • 2 1/4 cups flour
  • a dash of salt
  • sprinkles
Directions: 

 Preheat the oven to 350F.
 In a medium bowl, stir together flour, salt, and baking soda, then set aside.
 In a large bowl, cream butter and sugars together.
 Add in the budding package and cake mix and beat until well - blended.
 Add eggs and vanilla and mix until smooth.
 Next, add the flour mixture from the medium bowl slowly until well incorporated.
 Mix in sprinkles to your own liking.
 Roll into approximately 1" balls and place on greased baking sheet. I just used a spoon to make small blobs of dough on the tray, but if you find the dough too sticky to work with, try refrigerating it for 5-10 minutes.
 Bake at 350F for 10-12 minutes, or until golden brown.


From Chef-In-Training
 It is a rare moment where I forget

From Pineapple-Grass
to take a picture of something I've baked,
but this happened to be one of them. I found the picture on the left from the website where I got the recipe from. The one on the right I found in a Google search, but it was more along the lines of what my cookies looked like.


Wednesday, February 15, 2012

And the Winner Is....

Kendall's favorite pair of TOMS.
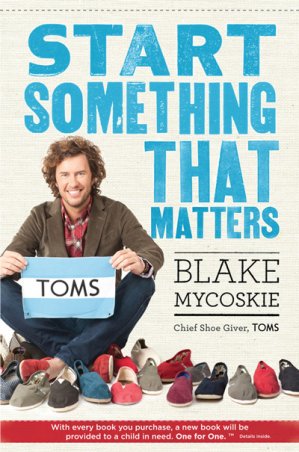
About a week and a half ago, I announced a giveaway on my blog for the book 'Start Something that Matters' by Blake Mycoskie (the founder of TOMS shoes). Last night, I put the names of each person that commented in a hat and drew one out, and Kendall is our winner! You can see the original post and book review here.


And since this post feels so short, I'm going to go ahead and share some of my recent photography with you.


Saturday, February 11, 2012

A Year With Jesus: By R.P. Nettelhorst

"Christ's words are of permanent value because of His person; they endure because He endures." 
                                                                                  -W. H. Griffith Thomas

A Year With Jesus is a simple devotional that focuses on drawing lessons and reflections from the words that Jesus spoke. Not stories about Jesus. Not facts and figures. Not Jesus' purposes, or what others said about him. Just His words.

Each devotional covers just one page, short enough to complete in less than ten minutes. As is suggested by the title, the book contains 365 of these quick devotionals. One thing I noticed about this book right away is instead of numbering the devotionals by dates, they simply put "Day 1." "Day 2." and so on, allowing you to start at any time of year.

The book is divided into ten sections, the topics covering: Love and Hate, Truths and Lies, Arrogance and Humility, Friends and Enemies, Belief and Disbelief, Patience and Impatience, Deserved and Undeserved, Good and Evil, Fidelity and Treachery, and Life and Death.

The devotionals start out with an excerpt from Scripture, usually 5-10 verses - something long enough to draw some truth or lesson from, but no so long as to exhaust readers that have trouble with long passages of reading. The devotional part of each day covers the second half of the page, and usually does not extend past a couple of paragraphs.

The author keeps the devotional part of each day's reading short and to the point in order to let keep your focus on Jesus' words. He provides insights on each days Scripture passage, explains the text, and leaves with an application for daily living, or an idea or theme he found in the passage. His ideas and applications are thought-provoking, and although simple, often bring to mind a situation in which I can use a certain verse or concept.

I'd recommend this book to someone who was looking for a daily devotional that would provide a specific study (words of Jesus) and thoughtful insights. You can pick up a copy of the book here.
Disclosure of Material Connection: I received this book free from the publisher through the BookSneeze®.com <http://BookSneeze®.com> book review bloggers program. I was not required to write a positive review. The opinions I have expressed are my own. I am disclosing this in accordance with the Federal Trade Commission’s 16 CFR, Part 255 <http://www.access.gpo.gov/nara/cfr/waisidx_03/16cfr255_03.html> : “Guides Concerning the Use of Endorsements and Testimonials in Advertising.”

Friday, February 10, 2012

A Little Bit about Panama

Panama is a beautiful country with a rich and diverse culture. I am so excited for the opportunity I have to travel there.

Panama has a tropical climate, with two main seasons : Wet and Dry. We'll be visiting Panama during their wet season. The average temperature for Panama during the time we're visiting is between the 70s and 90s, with 80- 90 % humidity. That's definitely way more humidity than I'm used to, but I'm sure I'll survive. :)


Some Panamanian fruits


Panamanian meals are simple, typically including meat, coconut rice, and beans as well as local fruits and vegetables. Some of the most common produce includes yucca, squash, and plantains. Breakfasts often consist of fried corn tortillas filled with eggs, meats and other goodies. Fresh fruit, eggs and toast are often served as well. And, if you're big on coffee, I've heard Panamanian coffee is delicious.  


From an Embera village.


We'll be staying in a hotel that is located in the heart of the tropical rainforest of Panama, near the Panama Canal and the River Chagres. We'll be visiting a few Embera tribes along the Chagras River.


Panamanian sloth


Panama also has many diverse species of animals and other wildlife. Panama is home to many different types of birds, including quetzals, macaws, amazons, parrots, toucans, and the national bird, the harpy eagle. Panama also has many different kinds of monkeys - white-faced capuchins, squirrel monkeys, spider monkeys and howler monkeys. Tropical fish, sea turtles, whales, dolphins, sloths, anteaters, and a host of other interesting animals can also be spotted.

Please continue to pray for my fundraising! Only 142 days left until I leave for the trip. :)


Saturday, February 4, 2012

TOMS Book Review and Giveaway!

"To know even one life has breathed easier because you have lived. This is to have succeeded."

Inside each of us, there is a desire to succeed. A desire to make a difference. We don't want to be purposeless and empty. We want to be remembered. We want to do something that matters. We want to change the world. But often, I think we look at it from too broad of a perspective. We sit at home and think, "One person can't make the whole world perfect and fix all of it's problems. I can't fix everything, so I just won't do anything."

In 2006, a man named Blake Myscoskie visited Argentina on vacation. While he was there, he got used to wearing the national shoe, called the alpargata. The shoe was a soft, casual canvas shoe worn by almost all of the local people. Blake loved the shoe, and thought it would have a great market in the United States, but pushed the thought to the back of his mind. After all, he was on vacation - he wasn't supposed to be working. Later on his trip, he met a woman who collected shoes from donors and gave them to kids in need. He was heartbroken to find out that many times they didn't have enough shoes to give out, or when they did, they weren't the correct sizes, and many kids were still left barefoot after her shoe drop-offs.

He wanted to change that. The idea he formed was simple. He would start a shoe company that sold shoes similar to the alpargata. For every pair he sold, he would give a pair of new shoes to a child in need. This was the basis of the TOMS story. In his book, Start Something That Matters, Blake Mycoskie shares his story while creating a guidebook to anyone interested in starting something that matters - something that makes a difference.

He gives six elements that give you somewhere to start as you create your idea, and then he shows you how to apply the concepts and elements. He devotes one chapter to each key trait, focusing on that trait, how he used it, how others are using it, and how you can use it. The six elements he gives are finding your story, facing your fears, being resourceful without resources, keeping it simple, building trust, and giving.

Each chapter is relatively short, but is packed with stories, advice and interesting (and entertaining!) tidbits along the way. Blake Mycoskie brings you along on his journey with TOMS, while showing you how to embark on a journey of your own. All of the chapters include stories from the TOMS business, as well as stories from others who have started their own businesses, organizations and companies. He also mixes in lots of tips on how you can use his six elements for your own dreams and ideas, questions to jump start your brainstorming, and advice and insight he has learned and gained along the way.

The book was definitely encouraging and inspiring. Everyone wants to do something to make a difference - and everyone can. It all comes down to taking the first step. Toward the end of his book, Blake says "The most important step of all is the first step. Start something! What if that idea in the back of your head is a really good one, one that might end up helping tens of thousands of people? You owe it to the world to act. Or maybe it will help only a few people : The same advice applies. ... Just because the first step is a very simple one doesn't mean that it can't lead someday to something profound."

I'm giving one copy of this book away (United States residents only, please)! All you have to do is leave a comment with a link to your favorite pair of TOMS. You can find all of their styles on the TOMS website : http://www.toms.com/. On February 14th, I will randomly choose one comment to win a copy of the book, Start Something that Matters.


*I received two copies of this book free from the TOMS company, one to keep, one to give away. The opinions in this post are mine, I was not paid to review the book, nor was I required to post a positive review.